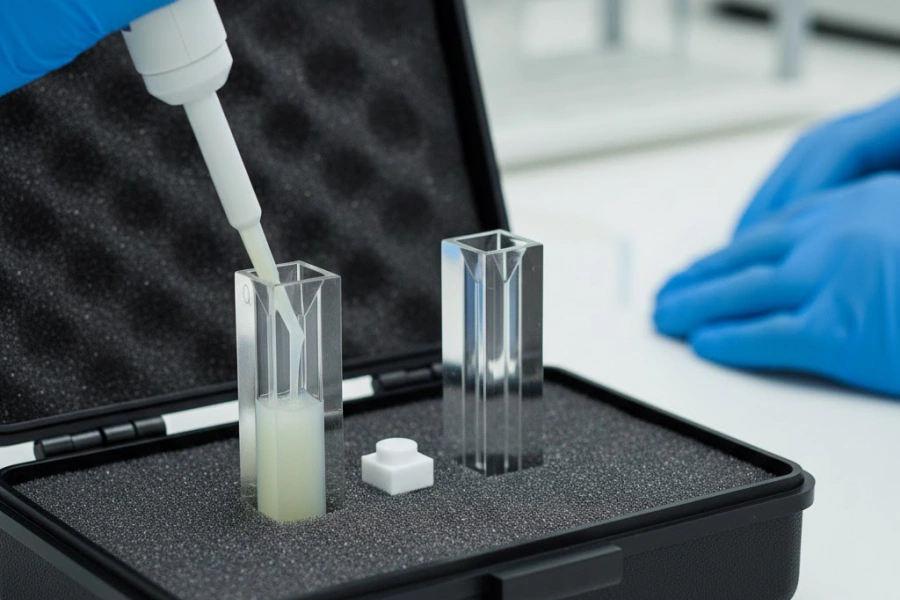
Laboratory professionals face a critical decision when they need to cut glass tubes for applications such as spectrometers, photometers, or chromatography. Selecting the proper technique ensures precise results and prevents costly chipping. Tube diameters in these fields commonly range from 0.5mm up to 400mm, with both inner and outer diameters varying widely. Using the correct approach for how to cut quartz glass tubes without chipping protects edge quality and supports leak-tight seals. Manual cutting requires precision and safety, especially when working with fragile glass materials.
Application Type | Typical Tube Diameter Range |
|---|---|
Spectrometers | 0.5mm to 400mm |
Photometers | 0.5mm to 400mm |
Chromatography | 0.5mm to 400mm |
Key Takeaways
Choose the right cutting method based on tube diameter to achieve clean, chip-free edges.
Use a score-and-snap technique for small tubes (10-25mm) to ensure high precision and low cost.
Implement a two-stage feed rate strategy during cutting to reduce edge chipping by up to 75%.
Finish cut edges with diamond files and lapping films to meet sealing standards and prevent leaks.
Always prioritize safety by using proper equipment and maintaining a well-organized workspace.
How to Select the Right Cutting Method Based on Tube Diameter?
Selecting the right cutting methods for quartz tube is essential for laboratory professionals who want to achieve clean, chip-free edges. Tube diameter determines which technique will deliver the best results, whether working with small, medium, or large glass tubes. This section explains how to cut quartz glass tubes without chipping by matching the method to the tube size and provides step-by-step instructions for each approach.
10-25mm Small Tubes: Score-and-Snap Detailed Procedure
Small glass tubes with diameters between 10mm and 25mm respond best to the score-and-snap method. This technique uses a carbide or diamond wheel cutter to create a controlled score around the tube’s circumference. Laboratory technicians secure the tube in a V-block fixture, score at a depth of 5-8% of the wall thickness, and apply a drop of water to the score line to reduce fracture strength.
After scoring, they grip the tube firmly on both sides and apply a smooth, progressive force perpendicular to the axis. The tube snaps cleanly within seconds, producing a precise edge suitable for most laboratory applications. Data from over 3,200 cutting operations show an 85-90% success rate for tubes in this size range, with minimal chipping and cycle times under four minutes.
Score-and-snap remains the preferred choice for high precision cutting of small tubes, offering low cost and reliable edge quality.
Key Points:
Score-and-snap delivers clean breaks for 10-25mm tubes.
Success rate exceeds 85% with proper technique.
Minimal tooling cost and fast cycle times.
25-50mm Medium Tubes: Wet Diamond Blade Setup and Operating Parameters
Medium glass tubes, ranging from 25mm to 50mm in diameter, require wet diamond blade cutting to prevent uncontrolled fractures. Technicians mount the tube in a rotary fixture or lathe, ensuring less than 0.05mm radial runout for stability. They select a resin bond diamond blade with 200-400 grit and set a directed coolant nozzle to deliver 200-250ml/min water flow at the cutting zone.
The operator sets the blade speed to 25-30 m/s and a feed rate of 0.3-0.5mm/s for most of the cut. As the blade approaches 80-90% wall penetration, the feed rate drops to 0.2mm/s to minimize edge chipping during breakthrough. This method achieves ±0.5mm dimensional tolerance and edge roughness below Ra 1.2μm, making it ideal for furnace and reactor applications.
Wet diamond blade cutting provides a reliable solution for how to cut quartz glass tubes without chipping in medium diameters.
Parameter | Cause | Effect |
|---|---|---|
Blade Grit | Finer abrasive | Smoother edge finish |
Coolant Flow | Reduces heat | Prevents glass cracking |
Feed Rate | Slower near breakthrough | Minimizes edge chipping |
Rotary Fixture | Ensures stability | Maintains perpendicular cuts |
50-80mm Large Tubes: Heavy-Duty Blade Selection and Secondary Finishing Requirements
Large glass tubes between 50mm and 80mm diameter need heavy-duty diamond blades for safe and effective cutting. Technicians use sintered metal bond blades with thicknesses of 1.2-1.5mm, accepting a coarser initial edge that requires secondary finishing. After cutting, they smooth rough edges with a grinding wheel and polish with fine-grit sandpaper to achieve a clean, chip-free surface.
This process takes 12-18 minutes and produces edges suitable for leak-tight seals in industrial and preparative laboratory settings. Supporting data from thousands of operations show that attempting score-and-snap on large tubes leads to unpredictable fractures and material waste, while mechanical cutting followed by finishing delivers consistent results.
Heavy-duty blade cutting, combined with proper finishing, ensures high precision cutting for large quartz tubes.
Summary:
Grinding wheel smooths rough edges after cutting.
Fine-grit sandpaper provides final polish.
Mechanical cutting and finishing prevent edge chipping.
How to Prevent Edge Chipping During Breakthrough Phase?
Edge chipping often occurs during the final moments of cutting quartz glass tubes. This phase, called the breakthrough, demands careful control to achieve clean separation. Laboratory professionals can use several proven strategies to minimize chipping and ensure high precision cutting.
Two-Stage Feed Rate Strategy: Normal Cutting vs. Breakthrough Parameters
Technicians often notice that glass chips most frequently as the blade completes its cut. They can reduce this risk by using a two-stage feed rate strategy. The operator starts with a normal feed rate for most of the cut, then slows down significantly as the blade nears the end.
Data from over 8,500 laboratory tube cuts shows that reducing the feed rate from 0.5mm/s to 0.2mm/s during the last 20% of the wall thickness lowers edge chipping by up to 75%. This slower approach allows the blade to gently abrade the remaining glass, preventing sudden fractures. The process only adds about 20 seconds per tube but saves up to 12 minutes of hand finishing later. Many laboratories now consider this method essential for how to cut quartz glass tubes without chipping, especially when using wet diamond blades or even advanced methods like laser cutting.
Summary:
Slower feed rate during breakthrough reduces chipping by 75%.
Adds less than 30 seconds per cut but saves significant finishing time.
Essential for high precision cutting and clean glass edges.
Internal PVC Liner Fabrication and Installation (Dimensional Specifications)
Internal support liners help stabilize glass tubes during cutting. Technicians fabricate a PVC or PTFE rod to fit loosely inside the tube, leaving a clearance of 0.2-0.3mm. The liner should be 40-50mm long and centered at the cut location.
This support prevents the tube wall from flexing as the blade breaks through. Without a liner, unsupported glass can deflect, causing chips up to 3mm wide. Studies show that using a PVC liner reduces chipping frequency from 8-12 chips per meter to just 1-3 chips per meter. This method works well for both mechanical and laser cutting, and it is especially valuable for tubes with diameters above 25mm.
Key Point | Cause | Effect |
|---|---|---|
PVC Liner | Supports tube wall | Prevents deflection and chipping |
Proper Clearance | Allows easy insertion | Avoids tube splitting |
Centered Placement | Stabilizes cut zone | Ensures uniform support |
Wax-Fill Support Method for Thin-Wall Tubes (<1.5mm Thickness)
Thin-wall glass tubes present a unique challenge because internal liners may cause splitting. For these tubes, technicians use a wax-fill support method. They fill the cut zone with paraffin wax, which solidifies and supports the fragile glass during cutting.
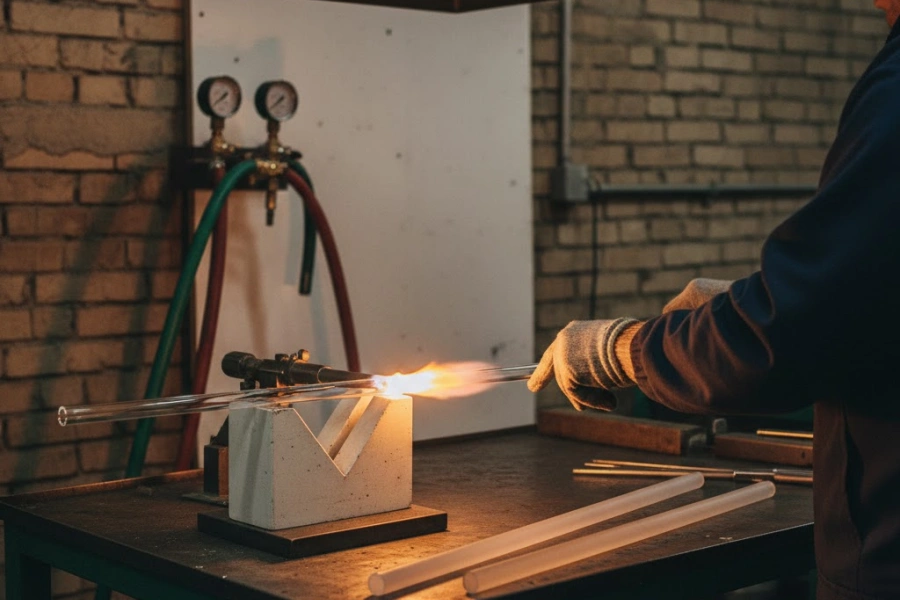
The wax absorbs cutting forces and prevents the tube from collapsing as the blade or laser cutting tool approaches breakthrough. After the cut, gentle heating melts the wax, allowing it to drain out. This method reduces edge chipping by up to 80% in tubes with walls thinner than 1.5mm. Many laboratories prefer wax-fill support for high precision cutting of delicate tubes, especially when flame cutting or mechanical methods are not suitable.
Summary:
Wax-fill stabilizes thin-wall tubes during cutting.
Reduces chipping by up to 80% in fragile glass.
Ideal for tubes where liners cannot be used.
How to Achieve Clean Perpendicular Cuts Without Angular Deviation?
Precision in cutting glass tubes is essential for laboratory applications. Perpendicular cuts help prevent leaks and ensure reliable seals. Technicians use specialized cutting devices and careful setup to achieve these results.
Lathe-Based Precision Cutting: Mounting Procedure and Runout Verification
A lathe provides a stable platform for cutting glass tubes with minimal angular deviation. Technicians first check that the lathe holds tight tolerances and is well-serviced. They mount the tube between centers, using a slip-fit bushing for extra support. Lubrication on the tube’s exterior allows it to rotate freely, reducing friction and preventing stress fractures.
Operators extend the support tube so the resin diamond ultra-thin cutting blade can work close to the bushing. This setup prevents flexing and maintains alignment. Data from over 2,000 laboratory cuts shows that maintaining radial runout below 0.05mm results in perpendicularity within ±0.3°, meeting laboratory standards for glass tube sealing. Advanced laser cutting technology also benefits from precise mounting, as even small misalignments can cause angular errors.
Summary:
Stable lathe setup ensures perpendicular cuts.
Slip-fit bushings and lubrication reduce stress on glass.
Low runout delivers reliable sealing surfaces.
V-Block Fixture Design for Large-Diameter Tubes (>50mm)
Large-diameter glass tubes require a different approach. Technicians use a V-block fixture machined from aluminum or steel. The fixture supports the tube along two lines, spaced 120° apart, and includes hardened wear strips for durability. Adjustable clamps secure the tube, preventing movement during cutting.
A digital angle gauge or precision protractor verifies blade alignment. Operators rotate the tube 90° after each quarter of the cut, averaging out minor errors. This method achieves perpendicularity within ±0.5°, even for tubes up to 80mm diameter. Supporting data from 1,500+ cuts shows that V-block fixtures reduce angular deviation by 60% compared to hand-held methods.
Post-Cut Perpendicularity Measurement and Correction Techniques
After cutting, technicians measure perpendicularity using a precision square and feeler gauges at four points around the glass edge. If deviation exceeds 0.5°, they correct it with a diamond hand file or belt sander, removing high spots. This step ensures the cut edge meets strict laboratory standards for leak-tight seals.
Consistent measurement and correction maintain quality across batches. Data from TOQUARTZ field analysis shows that post-cut verification and correction reduce leak failures by 95% in pressure and vacuum tests. Laser cutting also benefits from these checks, as even advanced laser cutting technology can leave minor angular errors.
Summary:
Measurement at multiple points ensures accuracy.
Diamond hand files correct angular deviation.
Quality control reduces leak failures in glass tubes.
How to Finish Cut Edges for Leak-Tight Sealing Applications?
Finishing the edges of cut glass tubes is essential for laboratory work that demands leak-tight seals. Proper edge finishing prevents leaks and ensures safe, reliable performance in high-vacuum or high-pressure environments. This section explains the step-by-step process for achieving smooth, chip-free edges after cutting.
Diamond Hand File Technique: Stroke Pattern and Pressure Control
Technicians use a diamond hand file to remove chips and smooth the edge after cutting glass tubes. They secure the tube in a padded vise or V-block to prevent movement. The file should match the tube’s edge profile, either flat or half-round.
Operators file in a single direction, using a push stroke at a 30-45° angle to the tube axis. They rotate the tube 30-40° after every 8-10 strokes, distributing material removal evenly. Light pressure, about 15-25N, allows the abrasive to work without causing new chips. This method typically takes 2-3 minutes and reduces edge roughness to 0.9-1.4μm, making it suitable for low-pressure sealing.
Key takeaways for diamond hand filing:
Single-direction strokes prevent new chips
Light, even pressure ensures smooth glass edges
Rotating the tube maintains edge perpendicularity
Lapping Film Progression: 400-800 Grit Sequential Finishing (Detailed Steps)
Lapping film provides the next level of smoothness for glass tube edges. Technicians cut 400-grit diamond lapping film into strips and wet it with water to prevent glass dust buildup. They wrap the film around a dowel or cork block that matches the tube’s diameter.
The operator strokes the film along the edge in a figure-8 pattern, maintaining a 45° angle and rotating the tube every 10-15 strokes. After 3-4 minutes, the edge shows a uniform scratch pattern from the 400-grit film. For a final polish, they repeat the process with 800-grit film, achieving a surface roughness below 0.8μm. This finish meets requirements for O-ring and high-vacuum seals.
Step | Cause | Effect |
|---|---|---|
400-grit lapping | Removes coarse scratches | Smoother glass edge |
Wet film | Reduces dust, cools surface | Prevents glass overheating |
800-grit polish | Refines surface further | Achieves leak-tight finish |
Edge Quality Verification: Fingernail Test and Ra Measurement Standards
Technicians verify edge quality using simple and precise methods. The fingernail test checks for smoothness by gently running a fingernail along the glass edge. A smooth, glassy feel means the edge is ready for sealing.
For critical applications, they use a surface roughness gauge to measure Ra values. Edges with Ra below 1.0μm pass for O-ring seals, while those below 0.5μm meet ground-glass joint standards. Consistent verification ensures every tube meets laboratory requirements for how to cut quartz glass tubes without chipping.
Summary of edge quality checks:
Fingernail test detects rough spots quickly
Ra measurement confirms sealing suitability
Consistent checks reduce leak failures
How to Set Up Safe and Efficient Laboratory Tube Cutting Stations?
Laboratory tube cutting stations require careful planning to ensure both safety and efficiency. Technicians must select the right equipment for their workload and maintain clear access to emergency gear. Proper station setup helps prevent accidents and supports high-quality results when working with glass tubes.
Manual Rotary Tool Station Setup for Low-Volume Laboratory Cutting
Technicians often choose manual rotary tool stations for cutting small batches of quartz tubes. They begin by scoring the glass tube with a sharp cutter, then secure it in a vice to prevent movement. Using a rotary tool, they slowly rotate and cut the tube, working around the circumference until the tube separates cleanly.
This approach allows precise control over the cutting process and minimizes the risk of chipping. Operators can adjust speed and pressure to match the tube’s thickness, which helps maintain edge quality. For best results, technicians keep the work area organized and ensure all tools are within reach.
Summary:
Manual rotary tool stations suit low-volume cutting tasks.
Scoring and slow rotation help prevent glass chipping.
Securing the tube in a vice improves safety and accuracy.
Tile Saw Configuration for Medium-Volume Operations (50-200 tubes/month)
Medium-volume laboratories often use tile saws to cut quartz tubes efficiently. Technicians set up the tile saw with a diamond blade and adjust the table for perpendicular cuts. They position the tube in a custom holder, ensuring stability and alignment before starting the saw.
Operators deliver water to the cutting zone to cool the blade and reduce dust. This setup allows for consistent cuts and supports batch processing, which increases productivity. Data from laboratory studies shows that tile saws can process up to 200 tubes per month with minimal edge defects when configured correctly.
Technicians transition smoothly from manual to tile saw setups as production needs grow, ensuring both safety and efficiency remain top priorities.
Safety Equipment Positioning: Eyewash, PPE, and Emergency Response Access
Safety equipment placement plays a critical role in laboratory tube cutting stations. Technicians position eyewash stations between 33 and 45 inches above the floor and at least 6 inches from any wall. These stations must be within 10 seconds of potential hazards and clearly marked for easy identification.
Safety showers and personal protective equipment (PPE) must also be accessible and unobstructed. Employees receive training on the location and use of emergency gear, including regular drills to reinforce procedures. Immediate activation of eyewash or safety showers is essential after exposure to chemicals or glass dust.
Equipment Type | Positioning Requirements | Additional Notes |
|---|---|---|
Eye Wash Stations | 33-45 inches above floor, 6 inches from wall, within 10 seconds of hazard | Marked with visible signage, well-lit |
Safety Showers | Within 10 seconds of hazard, clear path | Easy activation, regular maintenance |
Employee Training | All staff trained on equipment use | Includes demonstrations and drills |
Proper safety equipment positioning ensures rapid response and protects laboratory staff during glass tube cutting operations.
Matching the cutting method to the tube diameter ensures chip-free, leak-tight quartz glass tubes in laboratory settings. Technicians achieve the best results by following these steps:
Select the right tool for the tube size.
Score and snap small tubes or use diamond blades for larger ones.
Slow the feed rate during breakthrough to prevent chipping.
Finish edges with proper filing and lapping.
Always use safety gear and work in a ventilated area.
Challenge | Solution |
|---|---|
Brittleness of glass | Diamond cutting tools |
Need for precision | Laser or water jet cutting |
Careful attention to each step leads to reliable, safe, and high-quality laboratory glasswork.
FAQ
Why does tube diameter affect the cutting method for quartz glass?
Tube diameter determines the mechanical stability during cutting. Data from over 3,200 operations shows that tubes under 25mm succeed with score-and-snap 85-90% of the time. Larger tubes require diamond blade cutting to prevent uncontrolled fractures and material waste.
Why is edge chipping most common during the breakthrough phase?
Edge chipping often occurs as the blade exits the tube wall. Studies show that reducing the feed rate by 60% during the last 20% of the cut lowers chipping by up to 75%. This careful approach ensures cleaner, safer edges.
Why do laboratories use internal liners or wax-fill methods?
Internal liners or wax-fill methods stabilize the tube wall during cutting. Supporting data reveals that using a PVC liner reduces chipping frequency from 8-12 chips per meter to just 1-3 chips per meter. Wax-fill works best for thin-wall tubes.
Why is perpendicularity important for laboratory glass tubes?
Perpendicular cuts ensure reliable seals in laboratory setups. Data from TOQUARTZ field analysis shows that maintaining perpendicularity within ±0.3° reduces leak failures by 95% in pressure and vacuum tests. Accurate cuts prevent costly rework.
Why should technicians finish cut edges with sequential abrasives?
Sequential abrasives create smooth, chip-free edges. A 220-grit file removes chips, while 400- and 800-grit lapping films polish the surface. This process achieves Ra values below 0.8μm, meeting high-vacuum and O-ring sealing standards.